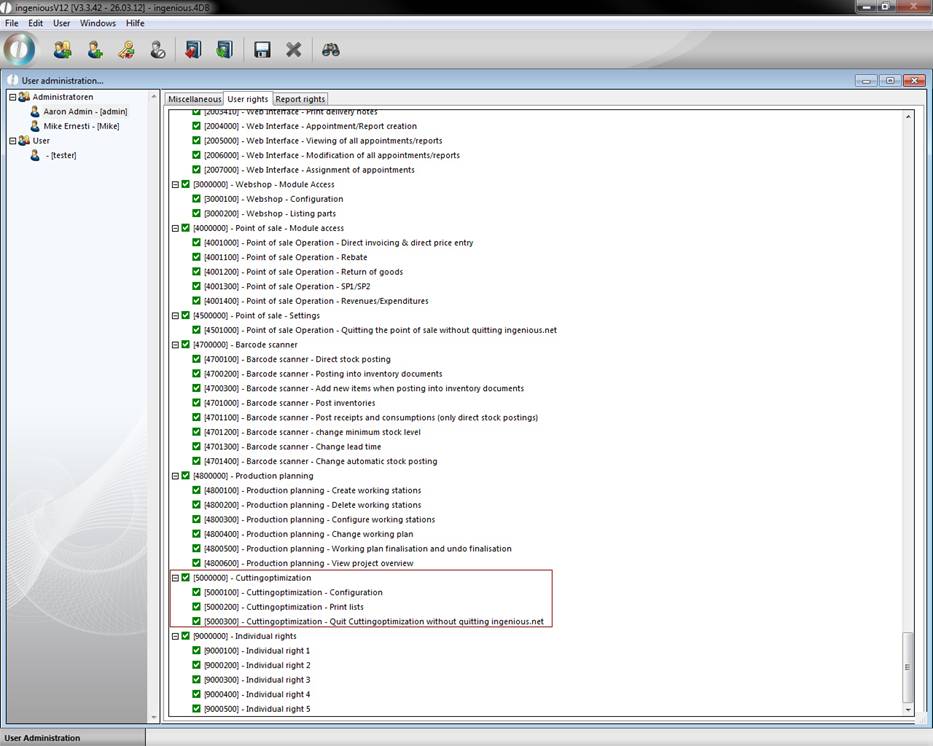
Cutting optimization automatically creates a plan for the optimal cut for selected meter articles. To activate the management tool “Cuttingoptimization”, the appropriate rights first have to be cleared in the user administration
Other conditions are that the affected meter articles in the detail view “Parameter” have activated the field “Cutting optimization” and the desired settings were updated in the column “Cuttingoptimization”.
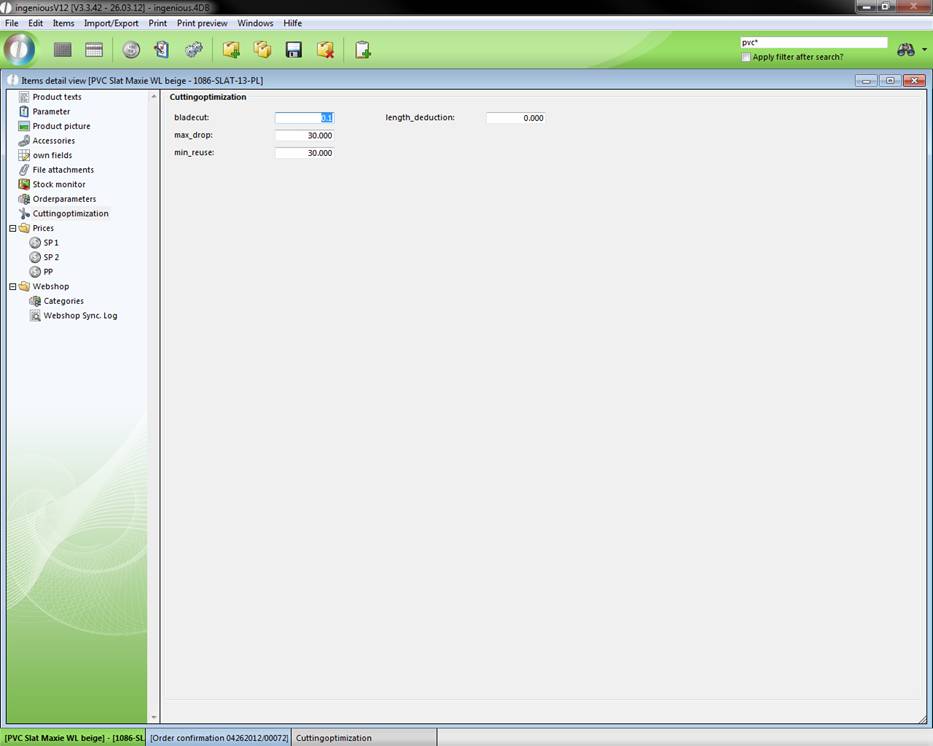
In the “Bladecut” field, you enter how many centimeters of waste are made when a good is cut (in the example shown, the cut is 0,1 inch). In the “max drop” from which length the material can be discarded is adhered to (i.e. from 30 inch), and lastly you determine from which length the article can be placed in stock or used again (i.e. starting at 32 inch). If the article will be added to a project that is linked to the automatic inventory posting (in this case at the completion of an order confirmation), the project document will be sent for cutting optimization as a result of the article settings. See that you have set the date in the project suitable to your definition at the category cutting optimization of the program settings.
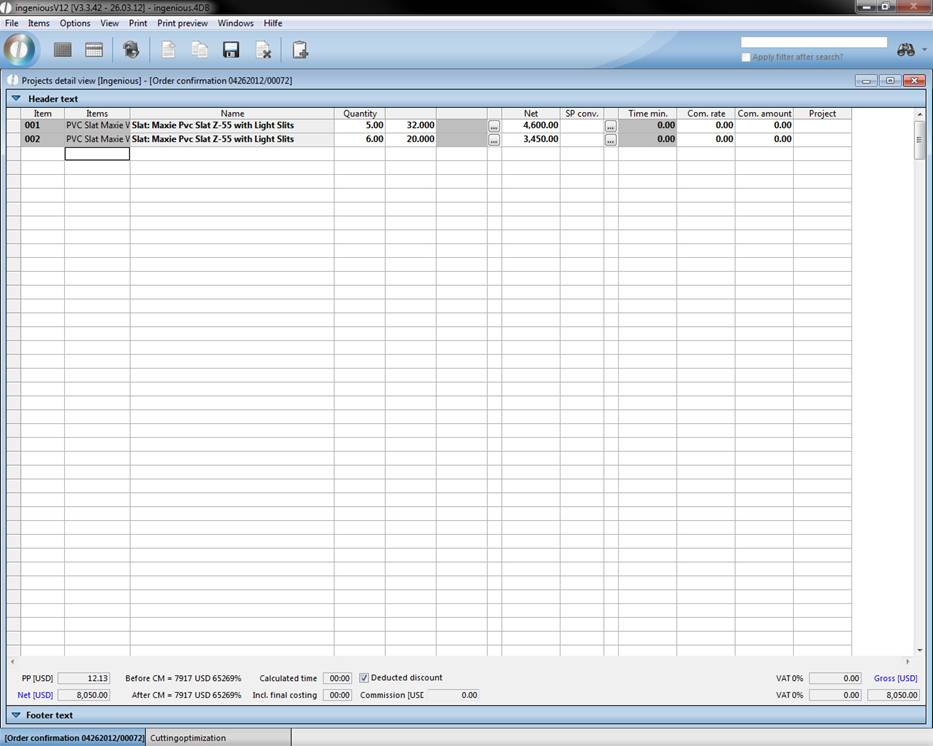
When you now open the administrative tool and indicate the time frame, the corresponding order confirmation will be listed. By clicking on an order confirmation, the display changes from ![]() to
to ![]() . With the
. With the ![]() button, you will see a list of all articles with a cut in the right portion of the window. When you click on the
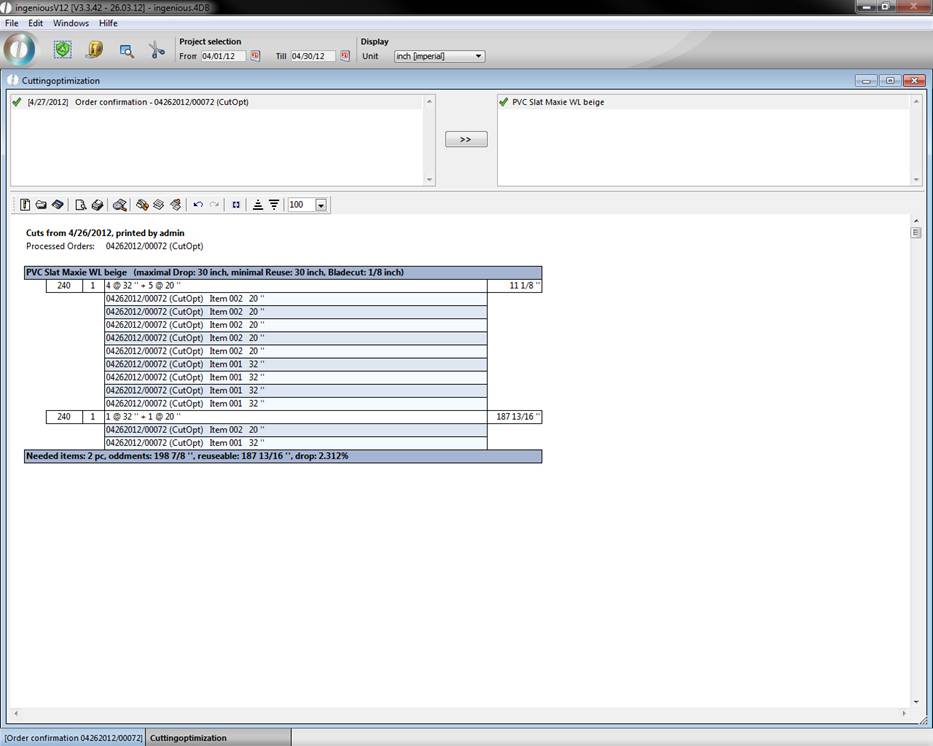
button, you will see a list of all articles with a cut in the right portion of the window. When you click on the ![]() button “Calculate optimized cut for the selected article”, the optimized cut calculation will be displayed.
button “Calculate optimized cut for the selected article”, the optimized cut calculation will be displayed.

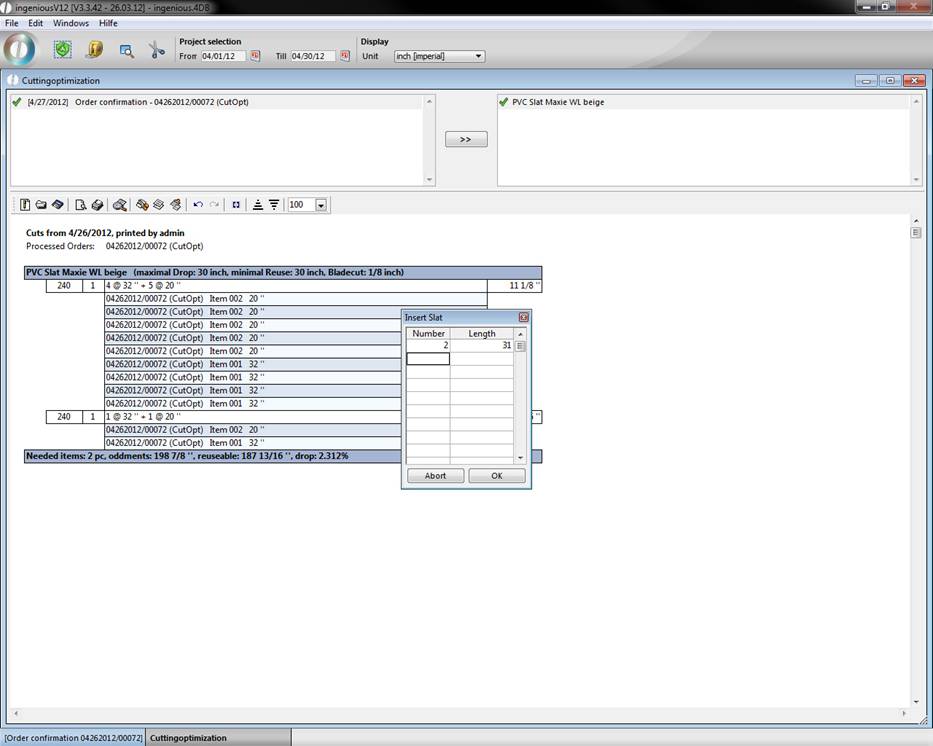
In the header you find the print date, the name of the one who printed the project and a list of the regarded projects. In the footer the needed item count, remaining length, the useable length and the drop in percent are shown. With the help of the button ![]() you can view detail information for the items.
you can view detail information for the items.
If you still have, for instance, remaining stock that should also be used, click on the ![]() button and enter the amount and the size in the window that appears.
button and enter the amount and the size in the window that appears.
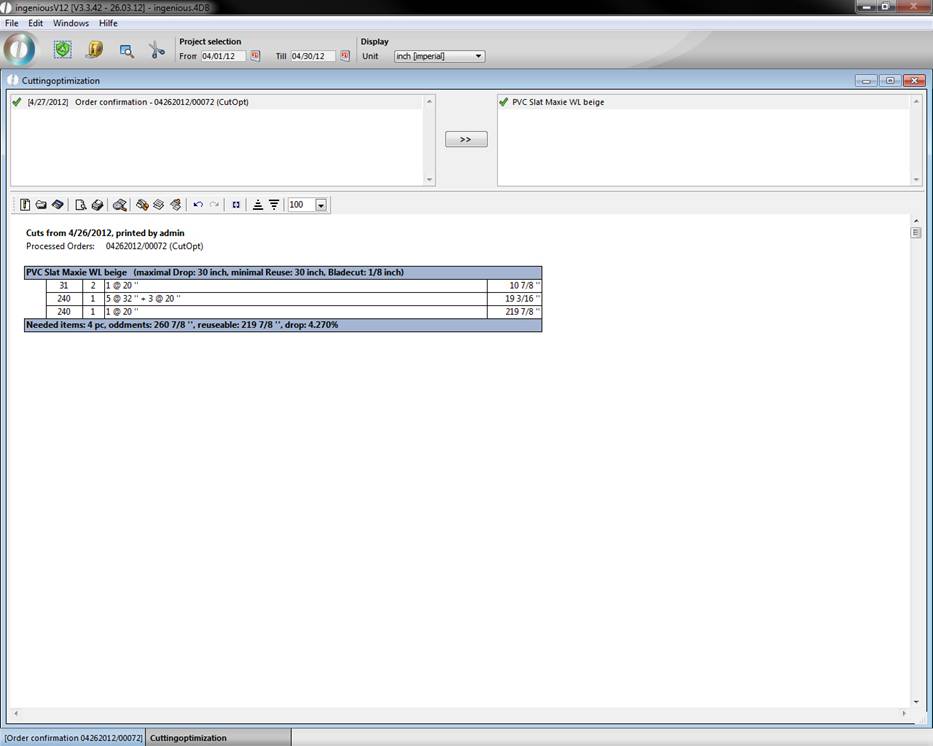
If you now click again on ![]() “Select optimized cut for selected article” the cut is calculated taking the waste into consideration.
“Select optimized cut for selected article” the cut is calculated taking the waste into consideration.
When the cut has been determined and the articles have been cut, you can close the cuts with ![]() . At the next cutting optimization, no cuts will be calculated for the corresponding article.
. At the next cutting optimization, no cuts will be calculated for the corresponding article.
In the future it will be possible to create the cut with a touch screen. You will find the appropriate settings in the program settings. At this time this option is in the developing stage.